Accounting Components
An example Financial Picture
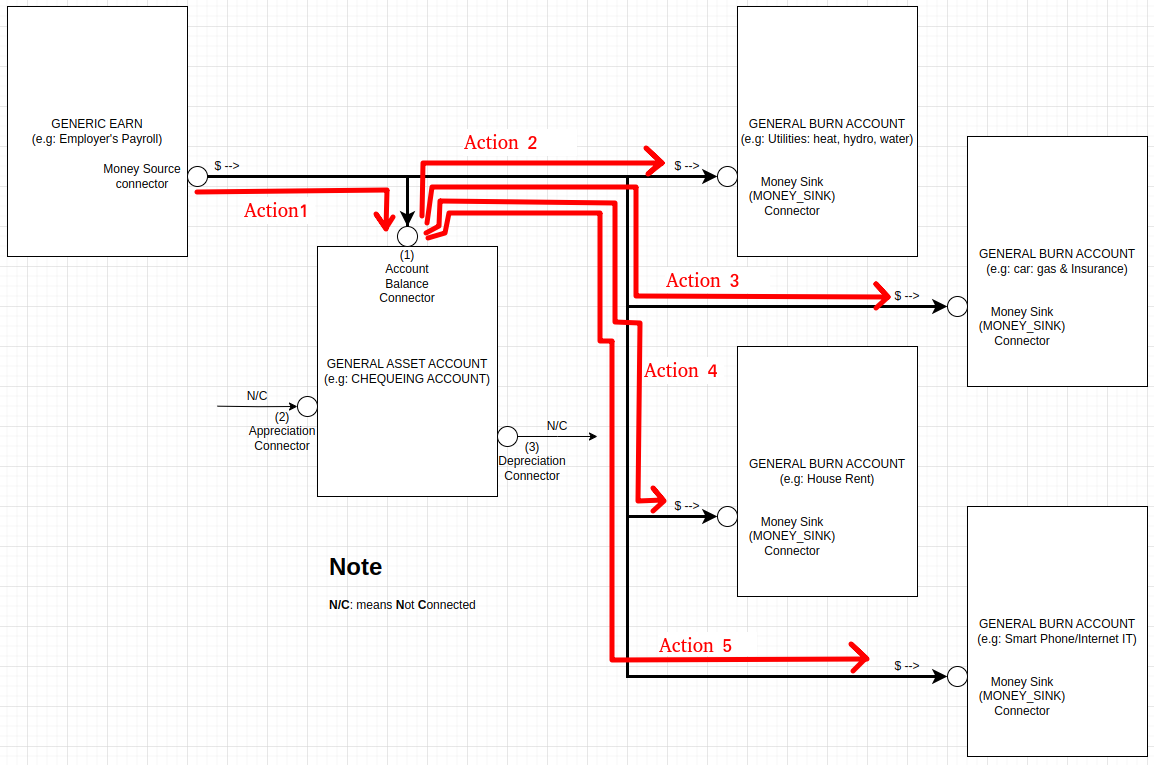
In this simple example, we have a person who works a job, gets paid bi-monthly (2 times a month), and has to pay for: rent, car (gas & insurance), utilities (heat, hydro, water), and Smart Phone/Internet (IT). Let’s now build up the financial picture and walk through how we would build this in the app, so we can look at his Chequing account balance and Networth.
The Picture
In this simple example, we can see that the EARN account is connected to the “General Asset Account” (the Chequing account) using this “Action 1”.
These “action lines” represent the movement of the actual money. In the case of Action 1, that action would be configured to move the Salary amount out of the Employer’s Payroll in the “Account Balance'“ connection point of the General Asset Account (which increases the value of the chequing asset account). The Action 1, can also be configured to repeatedly send money from the Payroll account to the Chequing account on a bi-monthly basis. But whats key is this:
The Boxes represents the accounts or financial objects/accounts where money can go, and the Action lines represents the configuration of the movement of money between those financial objects. With this we can accurately describe vast amounts of financial scenarios.
To complete the example:
Action 2: is an Action to pay for Utilities, by moving money out of the chequing account into the Utilities Burn account. We would configure Action 2 to move the money once a month, when the bill comes due.
Action 3: is an Action to pay for Car related payments, by moving money out of the chequing account into the Car Burn account. We would configure Action 3 to move the money once a month, when the car payments and insurance comes due.
Action 4: is an Action to pay for House rent, by moving money out of the chequing account into the House rent Burn account. We would configure Action 4 to move the money once a month, when the House rent comes due.
Action 5: is an Action to pay for paying for SmartPhone and Internet, by moving money out of the chequing account into the SmartPhone/IT Burn account. We would configure Action 5 to move the money once a month, when the bill comes due.
Each of these financial pictures, we call them “Scenarios” in the Web-app. So we usually create a scenario first, then configure the accounts and actions for the scenario we created. Next, let’s set this up in the Web-App, and see how the chequing balance changes as well as the Net Worth.